Ok, so I'm teaching myself how to papercut with the help of some online papercutters. Though they don't know they're helping me. Basically I have done research on what the best paper to use and tools. That's about it, the rest I've taught myself. Supposidly Etsy has been going around shops asking to prove they do their own work. Glad Zibbet doesn't do this! Well, I thought I might as well have it ready, you know, just in case they come after me! Also, I thought some of you might like to see my process.
You will probably see a lot of papercutters using Photoshop to make their designs (Or stealing images off of Google). I don't do this. #1: I can't afford photoshop. #2: I am an artist, why not use my God given talent? Who needs the computer? Although I do use the computer to research and get inspiration. If I see something I like on Google search I'll use the image as inspiration and change it to make it my own. NOT COPY IT!
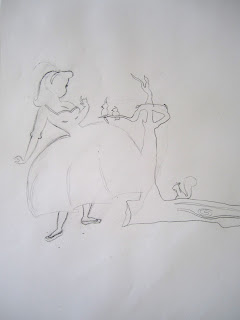
First I draw out my design. Nothing fancy. Just a pencil and my sketchpad. I do this sometimes at night while watching a movie or before I go to bed.
Here's the completed drawing.
The silhouette pape is black on one side and white on the other.
I then tape the image to the white side of the paper. I only put tape on the part of the image that will be cut away.
I get my tools ready. My X-Acto knife and a swivel knife. Pink of course.
I then cut out from in inside of the picture to the outside. It's easier this way. get all the tiny details first!
Then I pop it out.
.....Voila! I can't wait to post this one up. I love it!


Ah, this is really cool! I have been seeing some outstanding papercut work on Etsy and I wondered what the process was like. Really cute example, too.
ReplyDeleteThanks so much! They may do it differently. This is just the way I have taught myself. :)
ReplyDeleteSo fascinating to see how another artist works. I checked out your etsy store and LOVE your fairy tale papercuts!
ReplyDeleteThank you so much Jzin!
ReplyDelete