Tuesday, March 6, 2012

HAIR! Tutorial!


It was a bit windy outside...


Ok, so this has been a hairstyle I have always tried to do but haven't been able to. I have fine hair and a lot of it. Problem is I need a can of hairspray to keep a curl. Can anyone else relate?! Anyway, I am on pinterest all the time finding inspiration for my (soon to be) home and all sorts of other things, hair being one of those. If you're on pinterest at all you have probably run into this girl's blog. I watched a video tutorial from her blog, so please go check it out!

I learned many things from her site such as I have been curling my hair incorrectly all this time and how to not mess with the hair right after you make a ringlet. Let it cool first before tossling it. Go figure. Browse her site she has a ton of tutorials.

Here are some tips for you gals like me with fine uncurlable hair when doing this hairstyle. I didn't drench my hair in hairspray. I was sceptic at first, but it is staying in. I just did a little spray after I curled every section. Also. I put some products in my hair BEFORE blowdrying it. I like to use "Big and Sexy" root plump. I put this on my roots right before I blowdry my hair. I also put a little hairspray in it before blowdrying it. You can also go one more step more and put some gel in beforehand. Those two steps alone seemed to work fine for me. If you have LONG fine hair and have a hard time keeping curl, you may not be as successful. I just cut off 6 in. of hair, so it is much easier to curl now. If you do have a secret for keeping curl in your fine hair without it looking crunchy, please share!!


Will be going back to blonde before the baby comes! :)

Monday, February 13, 2012

Palette Knife Painting...How the heck do you do that?!

I've got myself obsessed with another art form. This one started up while in the middle of trying to close on a house and my mother offering us their burgundy recliner. This changed up my whole color palette idea for our hopefully soon to be living room. I have painted poppies before with oils...see picture below...


This painting is only 11 X 14 and though I could print it out bigger on canvas, I wanted something different and exciting. So I did a little research on etsy for some inspiration. This is what I found.


Can you say GORGEOUS?? This was done by a woman named Christine Krainock. You can find her etsy shop at http://www.etsy.com/shop/ChristineKrainock?ref=seller_info. I have seen art like this in Warm Springs, GA and I remember admiring it then. I decided I wanted to try and do a similar painting on a larger scale. So I did some research and bought the stuff. WELL, turns out I cannot find "how to" palette paintings anywhere online like Christine's and the couple I met in Warm Springs. So I'm going at this alone and experimenting....which sucks. The problem I'm having is getting the petals down in one "swoop". Other palette paintings I've seen have many strokes to them, but I like the cleaner look best. So where I'm at now, is I have no clue how she gets her petals on so cleanly. I tried a baby spoon...all the knives and they look like crap. I've been thinking in my head, "Maybe I just need to practice more with the knives.....or mix my paint and gel together and put it in an icing bag....dopple on dots and drag them out with the tool!" Drastic? Maybe, but it's getting to that point. I would love to buy one of her paintings, but I would feel best saying...."yeah, I did that!" when people ask me where I got it. :) Are you trying anything new? Please share!

*UPDATE* - I've been thinking about how to do this all day. I even thought about using a baby bottle nipple to make the smooth petals. Then I thought..."Come on, Ashley. Who says you can't use a paintbrush?". So, on that note, when Anya goes to bed tonight, I'm going to attempt those petals with a paintbrush. My hands know how to move a paintbrush a whole lot better than those knives! I'll keep you updated on how things are going!

Saturday, January 28, 2012

So, you understand the grid, now what?


The first time I used the grid was my senior year in High School. I was surprised to see they were teaching it at my college also. I'm not one to boast about my work. I'm highly critical of myself up until my art professor in college always used my stuff as an example. I couldn't believe it. The picture above was my very first drawing in college using the grid. Looks pretty good for a first drawing. I didn't believe it though. It took my professor to tell me this for me to believe it. So please don't be so hard on yourself and your work. Everyone is different in the way they execute art and it is all beautiful.

So, you've got the grid down pretty well and you want to challenge yourself a bit. Let's also assume you know how to shade. Shading is critical when doing a portrait drawing. I would love to teach you how to shade but it's almost impossible to do in writing. I recommend looking on you tube for some pointers or taking a class on drawing. Practice shading a ball. It helps you to understand where light hits on objects. Also the pencils you use are important. Everyone is different as far as what pencils they like to use. Some like charcoal, some like the soft pencils and some like the harder ones. Try them all out and see what you like best. Personally, I like the soft pencils 2b, 3b, 4b, 5b, and 6b are my favorites.
Anyway, you think you're ready to draw a portrait. What should you start with? I highly recomment starting with a celebrity photograph. They're the easiest for me to draw. They have a ton of makeup and great dimension on them. They're photographs are already art. Use a celebrity you like a lot. I used a lot of Johnny Depp in my early years of drawing. I love Edward Scissorhands.


And Gwen Stefani from No Doubt...That picture has a bad glare on it from being behind a glass case at school...


Eventually from a lot of practice you will find you understand the body more and shadows. You won't need the grid and will be able to draw whatever you want more freely. The good thing about learning the grid is if you ever get stuck on a picture you just can't get to look like the photograph, you have the grid that will guarantee you will get it right. Below are my latest works without using a grid.


As you will see I have evolved from pencil to oils and colored pencils. I highly suggest you play with different mediums and find your passion. I would love to see your work from when you started and where you are now! Happy Drawing.

Tuesday, January 17, 2012

How To Draw For Beginners- Using A Grid

Well, this has been an entry I have wanted to do for a while. It's hard to teach someone to draw anyway, much less by a blog with only pictures to show. I could do a video, but I am awkward on camera and wouldn't know where to begin. Quite frankly I get a little creeped out knowing that anyone in the world can watch me. So insecurities aside, I will attempt to teach you how to draw by using a grid. This is a method I use to this day especially with my portrait drawings when I want to get a face to look exactly like the real person. No it's not cheating, it's a guide. It is not easy by any means and it does take practice. I can't tell you how many people I have seen fail at this method in college just due to not measuring precisely. Today I will show you how to draw an easy cartoon character. A benefit of graph drawing is that you can double, or triple the size of the original print. We will be keeping the size of the drawing the same as the original to make things easy.

Supplies You Will Need:

1. Drawing Paper
2. A ruler
3. 8X10 copy of an image you like. Find an image on Google and print it out as an 8 X 10. Start with a simple cartoon. Not people.


-Your printer paper will be 8.5" X 11", so you will want to make an 8.5" X 11" frame on your blank sheet of drawing paper. *A note about rulers. Make sure the edge of the paper is lined up with the 0" mark, not the edge of the ruler! See photo below*


- After you make your frame on your drawing paper, it's time to make a grid on your original image you're drawing from. On each edge of the sheet you're going to make .5" tics.


- The smaller the squares, the more accurate you will be with your drawing. Be as dark as you want with this grid.

- When you make your tics, make sure their adjacent side is measured from the same edge. In other words, don't turn your ruler around. You'll understand this when you start to connect the tics. If your lines look all crazy you did something wrong.

-I cannot stress enough that you MUST BE PRECISE WITH YOUR MEASUREMEMNTS!!

- Once you have all your tics done, you can connect them. YOU MUST BE ACCURATE!


- Whew! Your grid is done! Now what?? Label those squares! Surely you remember doing something like this in math class! On the left vertical side will be labeled A-Q and on the top horizontal side will be 1-22.


- When you're done it should look something like this.


-Now you're thinking. Holy Cow! How tedious thank goodness I'm done! Sorry, you have to do it again! Make another grid on the rectangle you made on your drawing paper EXACTLY the same way you did with your original image. The only difference is you need to draw it about 100X lighter. You want to be able to erase the grid once you're done and not see it.


- Now you have a grid on both pieces. You're ready to draw! FINALLY! Put away that ruler!

- Now focus on each square as an individual. Draw what's in each square. Try to make the pencil flow nicely from one square to another. I started on his claw at square J-4 and worked my way from there.


\


-Once you're done, outline your cartoon with a fine point sharpie. Then erase your grid. Then Voila! A drawing done by fabulous you!


Wednesday, January 4, 2012

Losing weight has come to a HALT and a *NEW* Paper Cut!


Well, I was in the process of losing weight UNTIL I found out I am pregnant! WOW! That was fast! I am still taking time to get on the treadmill 4 to 5 times a week. I'm not running, but brisk walking for about 25 to 30 min. So, we are super excited and I have my first ultrasound in a couple of weeks along with Anya's 2nd birthday party!

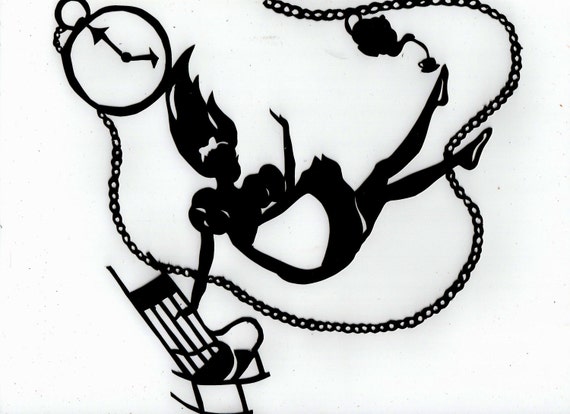
On the flip side of things, I have been doing a little bit of creating. I made another Alice In Wonderland Paper Cut. The Tea Party one does so well, I decided to make another rendition. I am going on this fairy tale kick. Anya brings it out in me I guess. I hope she loves it as much as I do. We're saving up money to go on a vacation when both of our kids are old enough to enjoy it. (I'm hoping for Disney World!). Disney World is such a magical place. My favorite part are all of the little details around the park. Things that most people wouldn't catch. Like the little mice inside Cinderella's Castle. I would have loved to be apart of that design team in creating.

Anybody ever been on a Disney Cruise? Would you reccomend it?


Pin It

Monday, November 28, 2011

How to clean the saddle springs on a bicycle.


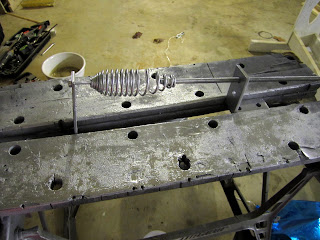
Upon trying to clean these springs/coils, whatever you call them, I got to a point where I thought "I will never be able to get to the inside"! So I did some research online thinking there had to be a video on how to clean these things! Well, I had no such luck. Lucky for me, I have a handy husband and father-in-law. With those two they were able to come up with a way to clean the inside! I decided to post this so if someone else like me were in this situation could follow this blog on how to clean them on the inside.


I don't know the names for half the stuff they used, but the pictures explain themselves really. They secured the springs inside with the nuts and pulled them apart securing them in a way it stayed uncoiled. Making it much easier to get in the inside.


 Though we still couldn't get in the inside with the tool, we had to use good ol' sandpaper. What you do is tear off a small, skinny piece and loop it around the inside of the coil. Then you sand the inside of the coil as if you were polishing the bottom of your shoe with a towel in a back and forth motion. Since the rust ruined the chrome, we decided to use the spraypaint chrome. I know it probably devalues it, but I don't plan on selling it and it's cheaper and will protect it from rusting again.

So I hope this helps those of you who may be wondering how the heck to derust the inside of those pesky coils!

Monday, November 21, 2011

Throw out your scale NOW!


Please pardon the no make up and sock bun! I'm multitasking by cleaning the house and doing laundry. Anyway! Wow! I have been doing the modified Britney workout for about 2 weeks now. 5 days a week. I have GAINED a pound but lost 1/2 in. So I weigh 146 now. I have been doing 150 - 200 crunches a day depending on when Anya wakes up. Flutter kicks and hip raises along with arm workouts. I have been doing about 10 min before and 10 to 20 min after depending on when Anya wakes up. I just had to share this with those of you struggling with the scale. I'm telling you now to throw it out!!  Bring out a taoe measure and do workouts where you rotate between cardio and strength. Also I learned to EAT BREAKFAST! If you don't, your body will go into starvation mode and turn everything you eat into fat! Just had to share my mini achievement with you. I was pretty excited. :)